
A venue walkthrough is a client-led, on-site inspection where you and your key team members visit your wedding venue to verify that every logistical detail is ready for your big day. This is not the same as the initial sales tour you took when you first fell in love with the space. Where a sales tour is designed to impress you, a final walkthrough is designed to confirm that the venue can actually deliver on every promise made during that first visit.
Think of it as your last real opportunity to catch anything that could go wrong before the wedding day itself. You are reviewing floor plans, confirming event timing, checking technical infrastructure, and walking through the space the way your guests will experience it.
The primary goals of a venue walkthrough include:
- Verifying the floor plan and finalizing table, ceremony, and vendor layouts
- Confirming event timing: ceremony start, meal service, music cut-offs, and venue exit
- Checking technical needs such as AV equipment, power outlets, and lighting
- Reviewing accessibility, restroom locations, and guest flow
- Identifying any rain backup plans or weather contingencies
- Clarifying vendor logistics including load-in routes and staging areas
When should you schedule the walkthrough, and who attends?
Final walkthroughs are typically scheduled approximately 60 days before the wedding date. That timing gives you enough runway to address any issues uncovered during the visit without the pressure of an imminent deadline.
Most couples visit their venue several times: once before booking, once for the final walkthrough approximately 60 days before the wedding date, and a third time for the ceremony rehearsal. The walkthrough is that critical middle visit where the floor plan gets finalized and the operational details get locked in.
Bringing the right people makes a real difference. A venue representative, your wedding planner or coordinator, and any key vendors whose work depends on the layout, such as your caterer, florist, or DJ, should all be present if possible.
Typical walkthrough attendees:
- The couple (both partners)
- Venue coordinator or venue manager
- Wedding planner or day-of coordinator
- Caterer or catering representative
- DJ or band leader
- Florist (especially for ceremony arch or reception centerpiece placement)
- Any other vendor whose setup requires spatial confirmation
For couples planning at a private home or across multiple venues, the same principle applies: schedule a dedicated visit to each location and bring whoever is responsible for setup and logistics at that site.
How to prepare for your venue walkthrough
Preparation separates a productive walkthrough from a casual stroll through a pretty space. Gather your floor plan, vendor contact list, and a draft event timeline before you arrive. If you do not have a wedding planner, bring a floor plan copy to the visit so you can mark up layouts in real time with the venue team.

Your checklist should be specific to your event, not generic. Think about the questions only your wedding raises: Where does the band set up if it rains? Which entrance do vendors use at 7:00 AM? Is there a dedicated bridal suite with a private restroom?
Steps to prepare before the walkthrough:
- Draft a detailed event timeline with ceremony, cocktail hour, dinner, and reception end times
- Compile a list of all vendors and their specific space or power requirements
- Gather the venue's floor plan and mark your preferred layout in advance
- Write out your questions organized by category: timing, logistics, technical, and accessibility
- Coordinate attendance with your planner and key vendors so everyone arrives together
- Review your contract for any restrictions on decor, noise, or vendor choices
Pro Tip: Focus your preparation on logistics, not aesthetics. You already love how the space looks. Use this visit to confirm that it works.
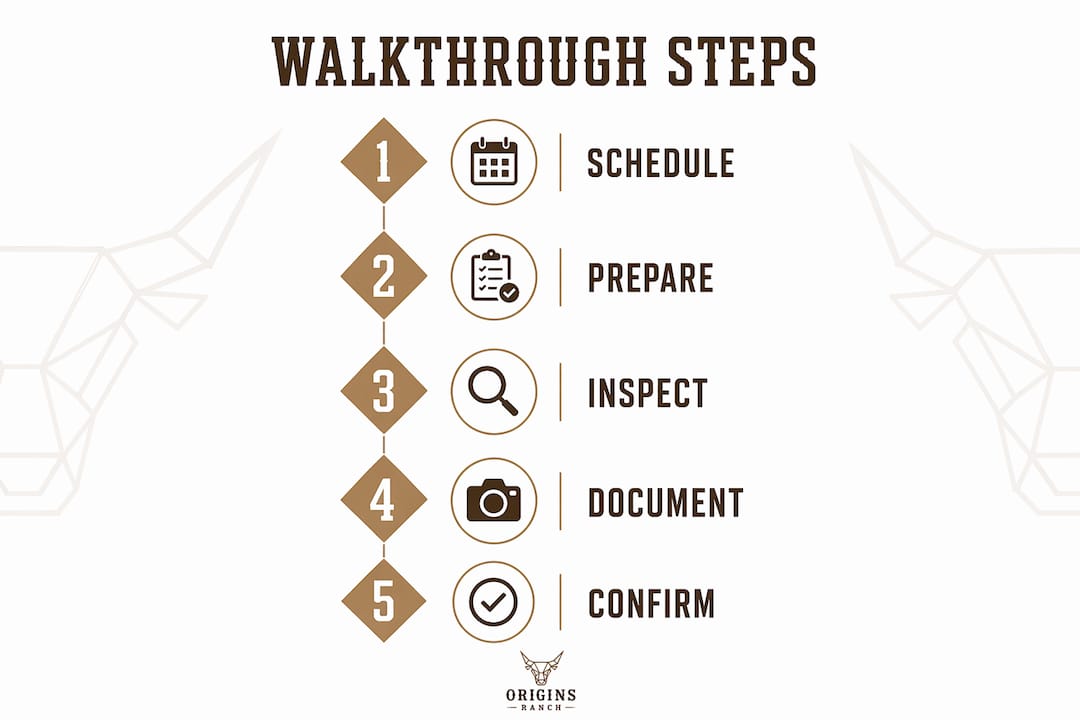
What actually happens during the walkthrough
Everyone arrives, introduces themselves, and clarifies their role in the wedding. That first few minutes of introductions matter more than they seem, because the venue rep needs to know who is making decisions and who is just observing.
From there, the group moves through the space together. The venue representative walks you through each area: ceremony space, cocktail hour location, reception room, vendor staging areas, and any back-of-house spaces your team will use. Someone, usually the venue rep, catering contact, or your planner, volunteers to draft the final floor plan and send it to everyone after the visit.

Timing is one of the most important conversations to have during this visit. According to wedding coordinator Elisabeth Kramer, the key timings to confirm include ceremony start time, venue entry and exit windows, reception end time, meal service start, last call, and any music or amplified audio cut-offs.
Typical walkthrough flow and questions to ask:
- Walk the ceremony space: confirm aisle width, altar placement, and guest sightlines
- Review the reception room: table count, dance floor size, and band or DJ positioning
- Confirm vendor load-in routes, parking, and freight or service entrances
- Ask about AV infrastructure: in-house sound system, microphone options, and power outlet locations
- Discuss weather backup plans for any outdoor elements
- Confirm ADA accessibility routes for guests with mobility needs
- Ask about noise curfews, open flame restrictions, and any decor limitations
- Verify restroom locations and capacity relative to your guest count
Plan for the visit to take about an hour to an hour and a half so you can cover every area without rushing.
What to do after the walkthrough
Document everything before the details blur together. Take photos of each space, note any concerns in writing, and confirm who is responsible for creating and distributing the final floor plan. If your planner or the venue rep is handling that document, set a deadline for when you will receive it.
Address any concerns promptly. If you noticed that the power outlets near the DJ area are limited, or that the rain backup tent feels cramped for your guest count, raise those issues with the venue within a day or two of the visit. Waiting weeks to follow up gives problems time to compound.
Once the floor plan is finalized, share it with your vendors and update your event timeline to reflect anything that changed during the walkthrough.
Practical next steps after the walkthrough:
- Send a follow-up email to the venue summarizing any agreed changes or open questions
- Request the finalized floor plan in writing with a clear delivery date
- Update your master event timeline and distribute it to all vendors
- Share the floor plan and timeline with your wedding party and key family members
- Confirm any vendor adjustments that arose from the visit, such as updated load-in times
- File your walkthrough notes and photos alongside your venue contract for easy reference
How a walkthrough differs from a sales tour, and what to inspect
A sales tour is led by the venue and designed to impress you. A walkthrough is led by you and designed to verify. That shift in who is driving the conversation changes everything about what you pay attention to.
During a sales tour, you are admiring the chandeliers and imagining your first dance. During a walkthrough, you are asking where the nearest power outlet is, whether the freight elevator fits a catering cart, and what happens to the outdoor ceremony if it rains. A venue inspection checklist keeps you from getting charmed into forgetting the unglamorous questions that actually determine whether your event runs smoothly.
Critical logistics to inspect during the walkthrough:
- Power outlets: quantity, location, and amperage near DJ, band, and catering areas
- ADA accessibility: ramps, elevator access, and accessible restroom locations
- Vendor loading zones: parking, entrance dimensions, and freight paths
- Restroom count and proximity to ceremony and reception spaces
- Technical infrastructure: in-house AV, Wi-Fi reliability, and lighting controls
- Rain or weather backup: tent capacity, indoor overflow space, or covered areas
- Guest flow: path from arrival through ceremony, cocktail hour, and reception
- Contract fine print: overtime fees, vendor restrictions, noise curfews, and insurance requirements
Pro Tip: Treat the walkthrough like a thorough interrogation, not a casual visit. The venue team expects detailed questions. Asking them is a sign you are a prepared couple, not a demanding one.
Walkthroughs also give you a chance to evaluate venue accessibility for guests with mobility needs, something that rarely comes up during a sales tour but matters deeply on the day itself.
Where the walkthrough fits in your overall wedding planning timeline
The venue walkthrough does not exist in isolation. It sits at a specific and purposeful point in your planning calendar, approximately 60 days before the wedding, after your vendor contracts are signed but before your final headcount and seating chart are locked.
By the time you arrive for the walkthrough, you should already know your approximate guest count, your vendor lineup, and your general event flow. That context is what makes the visit productive. Without it, you are walking through a space without knowing what questions to ask.
After the walkthrough, the planning shifts from big-picture decisions to fine-tuning. You are updating timelines, confirming vendor arrival windows, and making sure every person involved in your wedding day has the same information. Think of the walkthrough as the moment your wedding plan moves from a document on your laptop to a real, physical reality you have walked through with your own feet.
For couples planning at a barn venue or rustic outdoor setting, this timing is especially meaningful. Outdoor spaces have more variables: weather contingencies, lighting at dusk, ground conditions for guest mobility, and generator needs for vendors. Walking the property at the same time of day as your ceremony gives you a genuine sense of how the light falls and where your guests will naturally gather. Our barn venue wedding workflow goes deeper on how that kind of preparation translates into a smoother, more joyful wedding day.
Key Takeaways
A venue walkthrough is the single most effective step you can take to prevent surprises on your wedding day, and it works best when you arrive prepared, bring the right people, and follow up in writing.
| Point | Details |
|---|---|
| Schedule at 60 days out | Final walkthroughs are typically held approximately 60 days before the wedding date. |
| Bring your full team | The couple, venue rep, planner, and key vendors should all attend together. |
| Arrive with a checklist | Cover timing, AV, accessibility, vendor logistics, and weather backup during the visit. |
| Allow enough time | Plan for 60–90 minutes so you can inspect every area without rushing. |
| Follow up in writing | Document findings, request the finalized floor plan, and update all vendors promptly. |
FAQ
What do you do at a venue walkthrough?
You review the floor plan, confirm event timing, inspect technical infrastructure, and walk through the space with your venue rep, planner, and key vendors. The goal is to verify that every logistical detail is in place before the wedding day.
How long does a venue walkthrough take?
Plan for 60–90 minutes per venue. That gives you enough time to cover all key areas, ask your questions, and discuss any concerns without feeling rushed.
What is the difference between a venue tour and a walkthrough?
A tour is led by the venue and focused on making the space look appealing. A walkthrough is led by you and focused on verifying that the venue can support your specific event needs, from power outlets to rain backup plans.
When should the final venue walkthrough happen?
Final walkthroughs are typically scheduled approximately 60 days before the wedding, after vendor contracts are signed but before the seating chart and final headcount are locked.
What should I bring to a venue walkthrough?
Bring a copy of your floor plan, a written event timeline, your vendor list with their space and power requirements, and a detailed checklist organized by category: timing, logistics, technical setup, and accessibility.